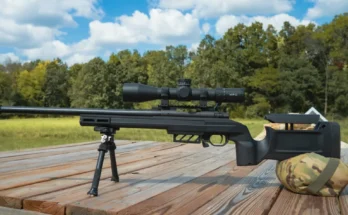
How do I protect my rifle scope during transport? That's one of the most common questions shooters ask, and for good reason. A modern rifle optic can cost anywhere from $300 to $3,000.
Even a single jolt in a truck bed can shift it off zero or scratch a lens. Your protection strategy depends entirely on how you're getting there.
Manufacturer specs indicate most quality rifle scopes are rated to handle serious shock. But that rating assumes the optic stays properly mounted on a rifle with recoil. In reality, transport damage usually comes from vibration, impact, and moisture instead.

Image source: Web (Bing) / sabretactical.co.nz (Web image (fair-use with source credit))
Quick Answer
To protect your rifle scope during transport, always verify ring and base torque first. Install lens caps and seat the optic in fitted foam inside a hard case. If flying, use a TSA-compliant locked hard case.
Keep the scope out of the truck bed where sand and rain can reach it. After every trip, shoot a verification group to confirm zero held.
Why Do Rifle Scopes Get Damaged During Transport?
Vibration, impact, and moisture. Those are the three main culprits behind scope damage during transport. Most of it doesn't happen dramatically.
It's subtle, gradual, and often invisible until you pull the trigger.
Vibration from rough roads slowly loosens screws over time. A single hard bump against a truck bed rail can dent an anodized finish or crack a turret housing. Dust and sand scratch lens coatings, reducing clarity and light transmission over the years.
Moisture is another silent killer. Condensation forms when a warm scope enters a cold, damp environment. That moisture gets inside the lens housing, and fogging becomes a real problem.
Here's what we see showing up most often in common failure points:
- Vibration loosening. Sustained driving on unpaved or gravel roads can gradually back out mount screws, especially if they weren't torqued to spec.
- Impact damage. Scopes dropped onto hard surfaces often show no visible damage but lose zero internally. Ring mounts can shift without obvious signs.
- Turret adjustment. Turrets bumped against gear inside a loose bag can click multiple positions without anyone noticing.
- Lens coating abrasion. Sand particles trapped between a lens cap and the glass cause micro-scratches over repeated contact.
The good news? Every one of these failures is preventable with the right transport preparation. The bad news?
Most of them happen because shooters skip the basics. Torque checks, lens caps, and a proper case aren't glamorous. But they're the difference between an optic that shoots where you aim and one that doesn't.
The Decision Variables That Change Your Protection Strategy
There's no single "right" answer to scope protection. The strategy changes based on a few key variables that you can assess before you even pack the truck.
Transport method. If you're driving 20 minutes to a local range on paved roads, your risk is low. If you're hauling gear 500 miles on dirt roads in a truck bed, the risk climbs dramatically.
Duration. Short trips expose your scope to less cumulative vibration. Long-haul drives mean hours of road vibration that can work screws loose over time.
Climate and conditions. Desert conditions bring sand and extreme heat. Mountain trips bring cold, humidity swings, and altitude changes. Wet climates mean moisture infiltration risk.
Vehicle setup. A scope riding in a locked gun rack inside the cab faces different challenges than one loose in a truck bed or strapped to a back seat.
Optic value and type. A $300 hunting scope and a $2,500 tactical optic deserve different levels of care, even though both need basic protection.
Here's a quick reference table to guide your decision:
| Transport Scenario | Risk Level | Recommended Protection |
|---|---|---|
| Local range, paved roads, under 1 hour | Low | Lens caps + basic soft sleeve |
| Medium distance, paved roads, 1 to 4 hours | Medium | Soft case or mounted in rifle case |
| Long distance, mixed roads, truck cab | Medium-High | Hard case with fitted foam |
| Long distance, unpaved/gravel, truck bed | High | Dedicated hard case, not in bed |
| Air travel (checked baggage) | High | TSA-compliant hard case + locks |
| Backcountry hunt, multi-day | Very High | Waterproof hard case with sealed foam |
If your situation falls in the low-risk column, don't overthink it. If you're in the high-risk column, invest in the right case and follow the full workflow ahead.
Choosing the Right Protection Based on How You're Traveling
This is where the decision tree kicks in. Match your situation to a branch and follow the corresponding actions.
If you're driving to a local range on paved roads:
- Keep the scope mounted on the rifle
- Install lens caps (bikini style is fine)
- Secure the rifle in a locked vehicle
- Minimal additional protection needed
If you're driving a long distance on paved roads:
- Verify ring and base torque before you leave
- Place the scope in a soft scope case or keep it mounted in a full rifle hard case
- Seat the rifle in the rear seat area, not the truck bed
- Add a neoprene scope cover for extra protection
If you're driving on unpaved or gravel roads:
- Use a dedicated hard-sided scope case with fitted foam
- The scope should never ride exposed in a truck bed
- Check torque specs before and after the trip
- Bring a bubble level for post-transport verification
If you're hunting in the backcountry or mountain environments:
- Invest in a waterproof hard case with sealed foam
- Include a lens cleaning cloth for dust and sand
- Remove turret caps if you're worried about accidental adjustment
- Plan for temperature swings that can cause condensation
If you're flying commercially:
- Use a TSA-compliant hard-sided firearm case with two locks
- Declare the firearm at check-in
- Scopes typically travel checked with the rifle (check airline rules first)
- Remove loose accessories and secure them separately
- Per TSA guidelines, firearms must be unloaded and in a locked hard case
The key principle is simple. Match your case and prep to the risk, not to habit. Don't bring a soft sleeve on a cross-country gravel-road trip.
Don't lug a full hard case to a 20-minute range session.
The Full Protection Workflow: From Torque Check to Zero Verification

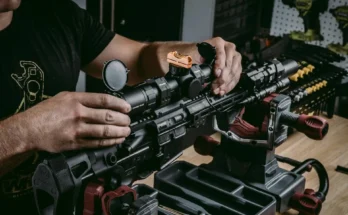
Image source: Web (Bing) / lokiconsult.com (Web image (fair-use with source credit))
When you're packing up for a trip, this step-by-step workflow protects your optic and your zero. Follow it every time, even for short trips.
Step 1: Verify ring torque.
Scope ring bolts should be torqued to the manufacturer's specification. Most aluminum rings call for 15 to 25 in-lbs. Steel rings typically need 25 to 35 in-lbs.
Use a quality torque wrench, not a standard socket wrench. Over-torquing crushes the tube. Under-torquing lets the scope shift.
As of 2026, Vortex Optics and most major manufacturers publish torque specs in their product manuals, and those numbers should be your reference point.
Step 2: Check base screws.
Your scope base bolts should be torqued to 25 to 30 in-lbs, depending on the manufacturer. A loose base moves the whole scope, not just the ring. Don't skip this step.
Step 3: Install lens caps.
Bikini caps or flip-up caps both work. The goal is to keep grit and sand away from the glass. If you're in a dusty environment, use caps that create a tight seal.
Step 4: Seat the scope in fitted foam.
Your hard case needs foam that holds the optic snug without over-compressing it. If the scope rattles when you shake the case, the foam isn't doing its job. If you're forcing it in, the foam is too tight.
Step 5: Clean the lens.
Wipe the objective and ocular lenses with a microfiber cloth before sealing the case. Sand trapped under a cap causes scratches every time the cap flexes.
Step 6: Lock and secure.
Use case locks rated for the transport method. For air travel, a TSA-approved lock is required on the firearm case. For vehicle transport, a simple padlock deters casual theft.
Step 7: Verify zero after transport.
This is the step most shooters skip. Shoot a group at a known distance. If your point of impact shifted, investigate the rings and base before adjusting the turret.
Most zero shifts trace back to a loose ring or base screw, not the optic itself.
A quick torque reference:
| Component | Aluminum Rings | Steel Rings |
|---|---|---|
| Scope ring bolts | 15 to 25 in-lbs | 25 to 35 in-lbs |
| Base screws | 25 to 30 in-lbs | 25 to 30 in-lbs |
Manufacturer specs vary, so always check the manual for your specific rings and base.
Common Mistakes That Ruin Zero or Damage Your Optic
These are the mistakes that show up again and again. Every one of them is avoidable.
Skipping the torque check before a long trip. If you haven't verified ring and base screws before a road trip, you're gambling. Vibration will find every loose bolt. It will find it at the worst possible moment.
Using bubble wrap or a towel instead of a case. Soft materials don't protect against impact or vibration. They also don't hold the optic in a fixed position. If the scope shifts inside its wrapping, the turret can bump, the lens can scrape, and zero can drift.
Putting the scope in the truck bed. Rain, sand, gravel dust, and temperature swings all damage optics over time. The cab of your vehicle is always the better choice. If you must use a hard case in the bed, place it on a rubber mat or secured surface, not loose.
Not checking the foam fit. Foam that's too soft doesn't immobilize the optic. Foam that's too dense can stress the tube or press on turret housings. Test the fit by turning the case upside down.
If the scope slides, the foam needs adjustment.
Forgetting turret caps. Exposed turrets bump against gear, get hit by loose items, and accumulate grit. Caps take two seconds to install and prevent most accidental adjustments.
Not verifying zero after transport. If you skip the verification group, you won't know your scope shifted until it matters. A single 5-round group at 100 yards tells you everything you need to know.
Flying without proper paperwork. Airlines require firearms to be declared and secured in a locked hard case. Showing up with a scope in a soft bag will get you turned away or, worse, have your gear damaged during handling.
Over-torquing "just to be safe." Squeezing the ring bolts as tight as you can crushes the scope tube. Follow the spec. Your torque wrench exists for a reason.
Each of these mistakes costs time, money, or both. A blown zero costs a re-scope job or a full re-zero session. A cracked lens housing can mean a warranty claim or an outright replacement.
None of them are hard to avoid once they're part of your routine.