How do I level a rifle scope? It's one of the most common questions new rifle owners ask, and the answer changes depending on what you're mounting and what platform you're shooting. A canted scope throws your point of impact off at every distance, and no amount of re-zeroing fixes the root cause.
Per manufacturer specifications from major optics brands, ring screws typically require 15 to 25 in-lbs of torque. Getting the leveling process right from the start saves you hours of frustration later.
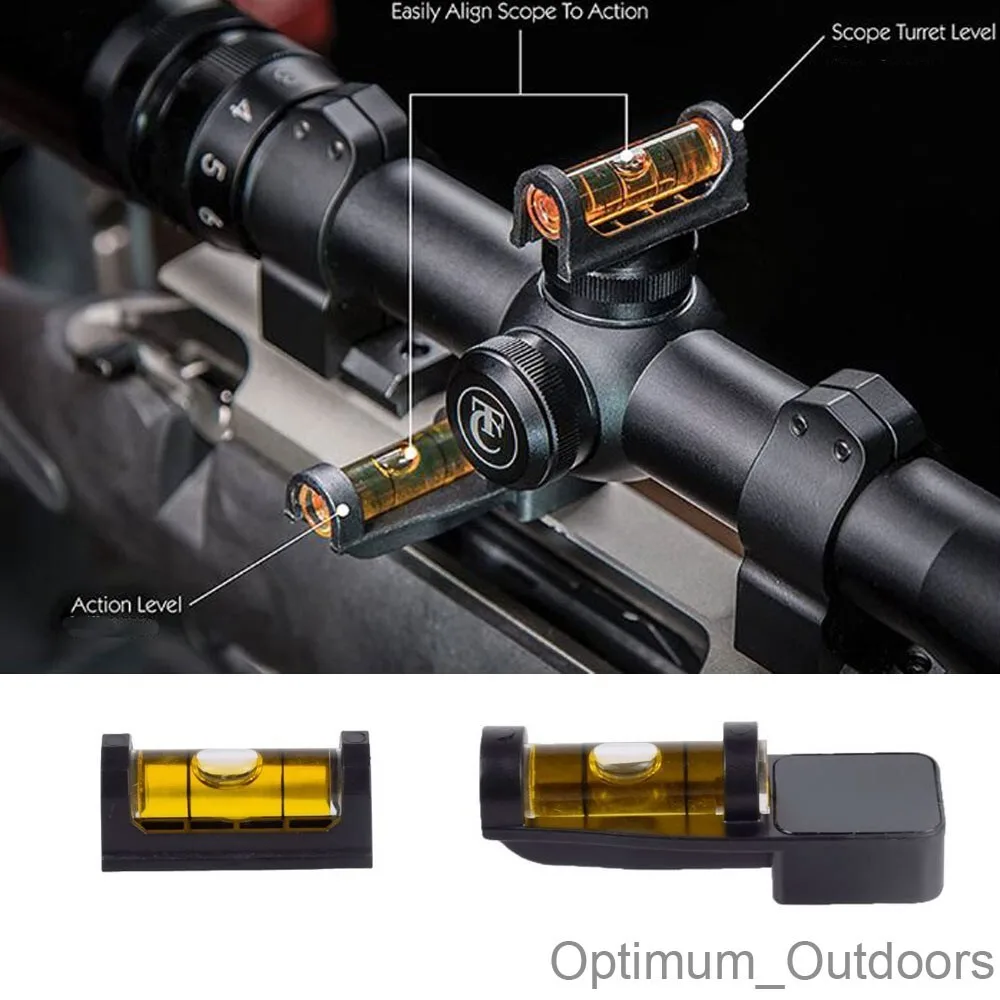
Image source: Web (Bing) / ebay.com (Web image (fair-use with source credit))
Quick Answer
Level a rifle scope by aligning the reticle's vertical crosshair with the bore. Torque the base or rail first to the manufacturer's spec. Set eye relief before tightening rings.
Use a bubble level on the rail as your reference. Tighten ring screws in a cross pattern to 15 to 25 in-lbs.
Why Your Scope Is Canting (And What It's Costing You)
Most canted scopes fail because the vertical axis of the reticle never matched the vertical axis of the bore. When the reticle sits even slightly off from true vertical, your crosswind corrections go sideways. Your elevation pushes the bullet up and to the left, or up and to the right, depending on which way the scope is canted.
The math is unforgiving. Precision rifle community research shows a 2-degree cant shifts your point of impact horizontally at 500 yards by several inches. That gap grows with distance.
At 1000 yards, even a 1-degree cant pushes impacts a full inch off target.
What "Leveling a Scope" Actually Means
Leveling a scope means making sure the reticle's vertical crosshair sits true to the bore's vertical plane. It does not mean leveling the scope to the ground. The ground slopes.
Your shooting position shifts. What matters is alignment between the optic and the barrel, nothing else.
The Two Things Most People Get Wrong Before They Even Start
First, they skip torquing the base or rail before mounting the scope. If the rail sits even slightly out of true, everything above it inherits that error. Second, they assume a bubble level on the turret proves alignment.
It doesn't. A turret is round. A rail is flat.
Your reference has to be flat.
Choose Your Method: Mounting System, Not One-Size-Fits-All
The way you level a scope depends on what you're mounting it to. There is no single method that works for every rifle. Match your approach to your mounting system.
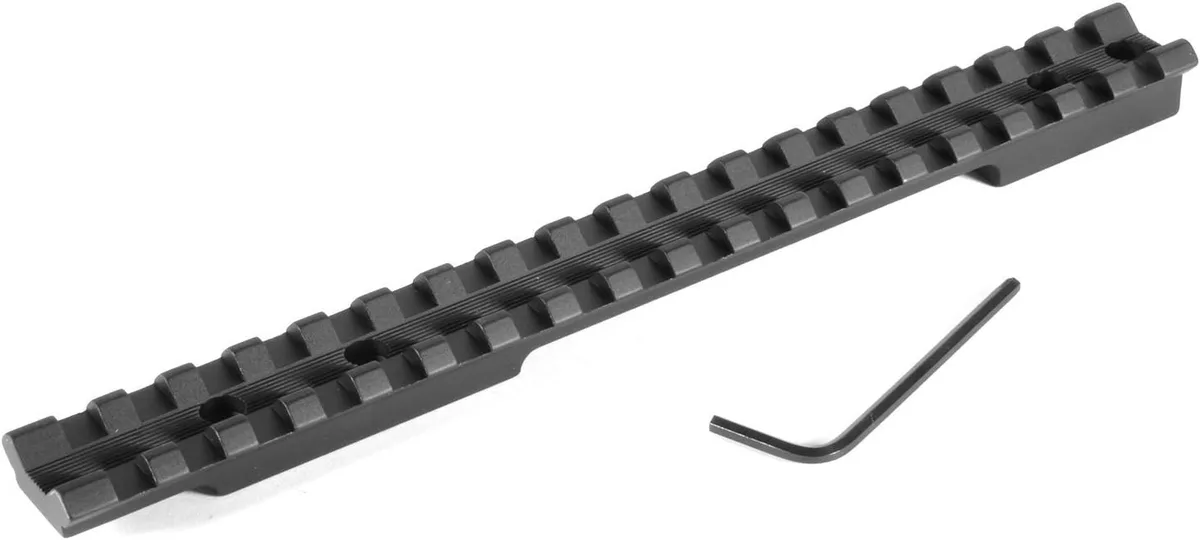
Image source: Bing (Web (fair-use with source credit))
| Mounting System | Ring Type | Common Platforms |
|---|---|---|
| Picatinny rail | Two-piece or cantilever | AR-15, modern bolt-actions |
| Dovetail (3/8" / 11mm) | Fixed two-piece | Older European rifles, rimfires |
| Integrated rail | One-piece mount | Custom precision rifles |
Bolt-Action Rifle with Picatinny Rail
If your rifle has a Picatinny rail, you're in the easiest scenario. The flat top of the rail gives you a clean reference surface. Place a bubble level on the rail, not on the scope.
Align the reticle to a plumb line or the level bubble, then tighten your rings.
AR Platform with Cantilever Mount
Cantilever mounts shift the scope forward for proper eye relief on an AR. The mount itself has to be level before you touch the rings. Tighten the cross-bolts to the rail first, typically 30 to 45 in-lbs for most Picatinny setups.
As of 2026, the Picatinny rail standard remains the dominant platform for modern rifles in the US market. Then follow the same leveling steps as a bolt-action.
Older Rifle with Dovetail Rings
Dovetail mounts are trickier because the rail surface is narrow. Some dovetail rings seat by friction, others use a clamp screw. Without a flat rail surface, use a small machinist level against the flat base of the ring.
Align the reticle carefully and tighten the clamp screw to spec.
The Full Leveling Workflow (Step by Step)
Here's the complete process. Follow each step in order. Skipping steps is how people end up chasing their zero all season.

Image source: Web (Bing) / lokiconsult.com (Web image (fair-use with source credit))
Step 1: Torque the Base First, Don't Skip This
Mount and torque your base or rail before the scope goes on. Use a torque wrench. Most Picatinny cross-bolts spec between 25 and 45 in-lbs.
Manufacturer instructions vary, so check yours before applying force.
Step 2: Set Eye Relief Before You Tighten Anything
Sit in your shooting position and look through the scope. Adjust forward and back until the full sight picture fills the field of view with no black ring around the edges. Mark your position with tape on the rail.
Step 3: Level the Rail, Then Align the Reticle
Place a bubble level on the flat top of the rail. Wait for the bubble to settle. Once centered, align the reticle's vertical crosshair with a plumb line or use the level as your vertical reference.
Step 4: Tighten Ring Screws in a Cross Pattern
Hand-tighten all four ring screws first. Then work in a cross pattern, turning each screw a quarter turn at a time. Alternate top-left to bottom-right, then top-right to bottom-left.
Stop at the manufacturer's torque spec.
Step 5: The Upside-Down Remount Test
Remove the scope. Flip it 180 degrees in the rings. Re-mount it the same way.
If the reticle shifts noticeably from where it sat before, your rings or alignment aren't right. Fix it now, not at the range.
Torque Specs, Threadlocker, and Tools You Actually Need
You don't need a gunsmith's bench to do this right. But you do need a few specific tools.
| Tool / Material | Purpose | Typical Range |
|---|---|---|
| Inch-pound torque wrench | Ring and base screws | 5–65 in-lbs |
| Bubble level (small) | Rail reference alignment | Any reliable level |
| Plumb line or string | Vertical alignment reference | N/A |
| Blue threadlocker | Ring screws (optional) | Medium strength only |
Per Leupold's published mounting guidelines and similar manufacturer documentation, ring screws should be torqued between 15 and 25 in-lbs depending on ring material. Steel rings tolerate slightly higher values than aluminum. Never exceed the manufacturer's stated maximum.
Manufacturer sites like Vortex Optics publish matching torque recommendations for their ring systems.
Blue threadlocker is optional. Some shooters skip it and re-check torque after the first range session. Others apply a small drop to each ring screw for long-term security.
The key is consistency. Pick a method and stick with it.
Common Mistakes That Cause Can't-Zero Problems
If your scope won't zero no matter how many adjustments you make, one of these is likely the culprit:
Canting the scope. The vertical crosshair isn't truly vertical. This causes horizontal point-of-impact shifts that get worse with distance.
Over-torquing the rings. Squeezing the scope tube too hard can pinch the internal erector assembly. Your adjustments stop behaving consistently.
Under-torquing the rings. Loose screws let the scope shift under recoil. Your zero walks, and you blame the ammo.
Skipping base torque. If the rail isn't secure, the whole optic system moves. This is the most overlooked step in mounting.
Mixing aluminum and steel rings. Different materials expand and contract at different rates. Under cold conditions, the mismatch can shift your zero.
Using the wrong ring height. A too-low mount sends the objective bell into the rail or handguard. A too-high mount makes your head position awkward and inconsistent.
Fix the root cause first. Re-zero only after your mounting is solid.
How to Confirm Your Scope Is Level at the Range
The real test happens on the range. Once your mounting is solid and your bore-sight is close, it's time to confirm everything actually works together. Bore-sighting gets you on paper.
Zeroing tells you if the mounting was right.
Start at 25 yards. Fire a three-shot group. If your impacts cluster well below the bullseye but stay roughly centered, your vertical alignment is likely good.
If the group drifts left or right of center, that's your cant showing up. Adjust the reticle and fire another group.
Check for Vertical Stringing
Vertical stringing happens when your reticle isn't truly vertical to the bore. Shoot a five-shot group at 100 yards and look at the shape. A tall, skinny group points to canting.
A round group means your mounting is holding steady.
Post-Zero Torque Check
After your first range session, re-check every ring screw with your torque wrench. Recoil can loosen screws that felt tight during mounting. If any screw has backed off, clean it, reapply blue threadlocker, and retighten to spec.
Wind Call Behavior
If your wind calls feel unpredictable, cant is often the culprit. A scope with slight cant pushes every wind adjustment in a direction you didn't account for. Once the reticle sits true, your holds start behaving the way your dope chart expects.
Frequently Asked Questions
Do I need a special tool to level a rifle scope?
No special tool is strictly required. A small bubble level and a plumb line or string can do the job effectively. Dedicated scope leveling jigs exist and can simplify the process, but many experienced mounters get reliable results with basic tools and careful technique.
What torque should I use for scope ring screws?
Most manufacturers spec ring screws between 15 and 25 in-lbs. Aluminum rings typically fall on the lower end. Steel rings tolerate slightly higher values.
Always check your specific ring manufacturer's documentation, and never exceed the stated maximum to avoid crushing the scope tube.
Can I level a scope with just the reticle and a bubble level on the turret?
No. Turret tops are round surfaces, so a bubble level sitting on them gives you an unreliable reference. Use a bubble level on the flat rail or mount base instead.
That flat surface gives you a true vertical reference for aligning the reticle properly.
How do I know if my scope is canted after I mount it?
The clearest sign is vertical stringing at 100 yards. A tall, narrow group suggests the reticle's vertical crosshair doesn't match the bore. Another red flag is inconsistent wind corrections, where shots drift further left or right than expected.
The upside-down remount test also reveals alignment issues before you shoot.