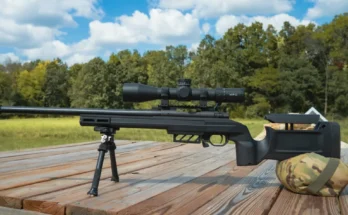
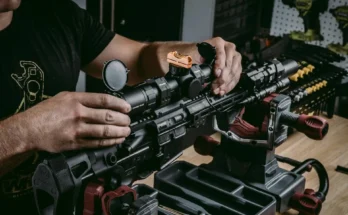
If you've ever opened a new scope box and stared at a pile of rings, bases, and screws with no clue where to start, you're not alone. The process is simpler than it looks, but every step matters.
The scope mounting system comes down to three parts: a base, rings, and the scope itself. Per MIL-STD-1913, the Picatinny rail interface standard, base dimensions follow fixed specs, so compatibility checks are about matching tube diameter and ring height. Let's start with the one check that decides everything.

Image source: Bing (Web (fair-use with source credit))
Quick Answer
To mount a rifle scope, confirm your tube diameter matches your ring size. Install the base and torque it to spec. Set the scope in the rings with correct eye relief.
Align the reticle level, then tighten ring screws in a cross pattern. Bore sight and live-fire zero next.
The One Compatibility Check That Determines Everything Before You Mount
The first check before mounting anything is tube diameter. Your scope's tube must match your ring size exactly. Install the wrong combination and you'll either crush the scope tube or end up with a wobbly mount.
A 1-inch tube needs 1-inch rings. A 30mm tube needs 30mm rings. Long-range optics sometimes use 34mm or 35mm tubes.
Here's a quick compatibility table:
| What to Check | Where to Find It | What to Match |
|---|---|---|
| Scope tube diameter | Marked on the scope body or spec sheet | Ring diameter: 1", 30mm, 34mm, or 35mm |
| Rail interface type | Your rifle's receiver | Base or mount interface |
| Ring height | Objective diameter + rail height | Low, medium, high, or extra-high |
| Action length | Long action vs. short action | Base length and ring spacing |
Most rifle scopes use either 1-inch or 30mm tubes. Vortex Optics publishes detailed mounting specs for each product line. It's worth checking their guides before buying rings.
As of 2026, 30mm has become the most common tube diameter in the $400+ scope range, though 1-inch options remain widely available at lower price points.
If your rifle has a factory-installed Picatinny rail, you're working with the most common interface. If it has a dovetail receiver, you'll need dovetail-specific rings. Some rifles come with a proprietary integrated system that takes unique rings you'll have to source separately.
Before buying anything, look up your rifle's model number. Most manufacturers publish receiver specs and mounting options online. This tells you whether your rifle needs drilling and tapping for a base, or if it accepts a drop-in rail.
Understanding the Three-Part Mounting System: Base, Rings, and Scope
Every rifle scope mounting setup has three components working together. Miss any one of them and the whole system fails.
The base attaches to your rifle's receiver. It provides the rail or interface the rings sit on. Common base types include one-piece Picatinny rails, two-piece bases, and direct-mount systems.
Some rifles use a factory-installed rail. Others need a drilled and tapped receiver for base screws. Base screws torque to 20 to 35 inch-pounds depending on the manufacturer.
The rings clamp around the scope tube and sit on the base. They come in split-ring and quick-detach styles. Steel rings handle heavy recoil well.
Aluminum rings are lighter and fine for most hunting calibers. Titanium rings split the difference at a higher price point.
The scope sits inside the rings. Its tube diameter determines which rings fit. The objective lens diameter determines ring height.
The whole assembly must clear the barrel, iron sights, and any accessories on your rifle.
Image source: Web (Bing) / globalmarksman.com (Web image (fair-use with source credit))
When all three components are matched correctly, your scope holds zero through recoil and weather. Leupold publishes torque specs and ring compatibility charts for their full product line.
Ring Height, Eye Relief, and Torque Specs: The Variables That Change Your Setup
Three variables change every mounting setup: ring height, eye relief, and torque values. Get any one wrong and you'll feel it at the range.
Ring height is measured from the base top to the scope tube center. Low rings sit at about 0.42 inches. Medium rings sit near 0.50 inches.
High rings sit around 0.62 inches. Extra-high rings reach 0.78 inches or more. Match ring height to your objective diameter and barrel profile.
A 56mm objective needs high rings to clear the barrel. A 24mm objective clears with low rings on most rifles.
Eye relief is the distance from your eye to the rear lens. Most modern scopes need 3 to 4 inches. Too close and you risk scope bite under recoil.
Too far and you get a black ring around the image. Slide the scope forward or back in the rings until the reticle fills your view at a natural shoulder position.
Torque specs prevent damage and ensure security. Ring screws typically take 15 to 25 inch-pounds. Base screws usually take 20 to 35 inch-pounds.
Always check the manufacturer's spec sheet. Per Vortex Optics guidance, exceeding torque values can permanently crush the scope tube.
Use a torque wrench with inch-pound markings. A preset torque screwdriver works well for beginners who mount scopes infrequently.
Step-by-Step Workflow for Mounting a Rifle Scope
Follow this workflow in order. Each step depends on the one before it.
Step 1: Confirm compatibility. Match tube diameter to ring size. Match rail type to base interface.
Step 2: Unload the rifle. Remove the magazine. Check the chamber. Always verify the firearm is clear before mounting hardware.
Step 3: Install the base. Place it on the receiver or rail. Apply a small dot of blue thread locker to the screw threads. Torque the base screws to manufacturer spec using a cross pattern.
Step 4: Set eye relief. Place the scope in the lower ring halves. Slide it forward or back until the reticle fills your view at shoulder position.
Step 5: Bore sight. Remove the scope. Look through the bore at a target 25 to 100 yards away. Align the bore center with the target center.
Step 6: Reinstall and align. Put the scope back in the rings. Level the reticle using a scope level or the vertical edge of a door frame.
Step 7: Torque ring screws. Work in a cross pattern. Snug each screw incrementally rather than tightening one side fully. Check for even pressure across all four screws.
Step 8: Live-fire zero. Shoot a three-shot group at 25 or 50 yards. Adjust windage and elevation as needed.

Image source: Web (Bing) / lokiconsult.com (Web image (fair-use with source credit))
What Goes Wrong When You Mount a Scope Incorrectly
Most scope failures trace back to a handful of mounting mistakes. Here's what goes wrong and why.
Scope walking under recoil. This is the most common failure. Screws are under-torqued or thread locker wasn't applied. The scope shifts shot after shot.
Your zero walks, and groups keep opening up for no obvious reason.
Scope tube cracking. This happens when ring screws are over-torqued. Aluminum 1-inch tubes are especially vulnerable. Manufacturer specs cap ring torque at 15 to 25 inch-pounds for this reason.
Cant. The scope sits not level with the bore axis. Windage adjustments drift when you dial elevation. Shooters blame the rifle when the real problem is a canted mount.
Wrong ring height. If the objective bell contacts the barrel, accuracy dies instantly. If ring height is too high, your cheek weld suffers and your shooting form falls apart.
Loose base screws. A single backed-out base screw shifts the whole system. Use thread locker and proper torque specs every time.
Preventing these failures comes down to three habits: match components correctly, use a torque wrench, and apply blue thread locker to every screw.
Picatinny, Weaver, and Direct Mounts: Picking the Right Interface
Your rifle's receiver dictates which mounting interface you're working with. Each system has trade-offs in strength, weight, and flexibility.
Picatinny rail (MIL-STD-1913) is the modern standard. It has a wide, flat top with square slots spaced 0.354 inches apart. This slot geometry locks rings and accessories in place under recoil.
Picatinny dominates the tactical and long-range world. It accepts the broadest range of aftermarket accessories. If you're shooting an AR-15 or a modern bolt-action rifle with a factory rail, this is your interface.
Weaver rail looks similar but uses a narrower slot pattern. Weaver bases and rings fit together, but not all Weaver rings lock securely into a Picatinny rail. Weaver was the older standard and still appears on many legacy hunting rifles.
If your rifle has a Weaver base, match it with Weaver-specific rings to avoid fit issues.
Direct-mount systems skip the base entirely. The rings or mount bolt straight into the receiver. Some rifles ship with integrated dovetail rails.
These systems keep the optic lower and lighter. They're common on rimfire rifles and some lever-actions. The trade-off is less modularity.
Who needs what:
| Interface | Best For | Limitation |
|---|---|---|
| Picatinny | AR platforms, long-range bolt guns, tactical use | Slightly heavier |
| Weaver | Legacy hunting rifles, budget builds | Narrower accessory compatibility |
| Direct mount | Rimfire, lever-action, weight-conscious builds | Less flexible, rifle-specific |
If your rifle already has a Picatinny rail, use Picatinny-compatible rings. If it doesn't, and you're mounting a bolt-action for hunting, a two-piece base drilled into the receiver works well and keeps your setup slim.
Pro Tips from the Range and the Gunsmith Bench
Small habits make the difference between a scope that holds zero and one that walks after ten shots.
Use a witness mark. After torquing ring and base screws, draw a thin paint pen line across each screw head and onto the ring or base. If that line ever breaks during shooting, you'll see it immediately at the range. This is standard practice at Nightforce Optics authorized dealerships.
Torque in stages. Don't crank one screw to full spec and then move to the next. Work in a cross pattern, bring each screw to about 75% of target torque, then do a second pass to reach spec. This keeps even pressure across the tube.
Apply thread locker sparingly. One small drop on the screw threads is plenty. Blue thread locker (Loctite 242) holds firm under recoil but comes off with hand tools when you need to re-zero or remove the scope.
Bore sight first, adjust second. A bore sighter aligns your point of aim with your point of impact before you burn through ammo. Use an optical bore sighter for best results, or a laser bore sighter for quick field checks.
Check your level every session. If you shoot in different conditions or your rifle sits in a case for months, verify the reticle is still level before your first group. Scope cants creep in from transport and temperature swings.
Torque wrench calibration matters. A cheap, uncalibrated wrench gives false readings. Budget $50 to $200 for a reliable inch-pound torque wrench. Your scope is worth more than that.
Rifle-specific mounts beat universal ones. If a manufacturer makes a direct-mount solution for your exact rifle, use it. One-piece rings bolted to the receiver remove the base layer entirely, reducing points of failure.
Let blue thread locker set for 24 hours before live fire. It cures faster at room temperature. Shooters who zero immediately after mounting risk moving screws during the cure window.
Rifle Scope Mounting FAQs
What torque should I use for scope ring screws?
Most scope ring screws take 15 to 25 inch-pounds of torque. Always check the specific manufacturer's spec sheet before tightening. Over-torquing can permanently crush the scope tube, especially 1-inch aluminum models.
How do I bore sight a rifle scope?
Remove the scope, look through the bore at a target 25 to 100 yards away, and align the bore center with the target. Reinstall the scope, align the reticle vertically, then confirm with live fire.
What ring height do I need for my scope?
Match ring height to your objective lens diameter. A 24mm objective needs low rings. A 44mm objective needs medium rings.
A 50mm or 56mm objective typically needs high or extra-high rings.
Can I mount a scope without a gunsmith?
Yes, if your rifle has a drilled and tapped receiver or a factory Picatinny rail. Drilling and tapping a receiver by hand is not recommended. That's a job for a shop with proper fixtures.
How long does it take to mount a rifle scope?
A full mount from bare receiver to bore-sighted setup takes 30 to 60 minutes. Live-fire zeroing adds another 30 minutes at the range depending on ammo availability.
Will blue thread locker damage my scope?
No, blue thread locker (Loctite 242) applies to screw threads only, not the scope body. It holds firmly under recoil but releases with hand tools when heated or torqued off.