How do I check if my rifle scope is mounted correctly? That question comes up constantly among shooters who just finished a new mount job or inherited a rifle with an optic already on it. The answer isn't as simple as "give it a shake and see what happens." A scope can look perfectly mounted and still shift point of impact the moment recoil hits it.
What separates a solid mount from a sloppy one comes down to a handful of verifiable checks. Manufacturer specs indicate that most scope ring screws should sit between 15 and 25 inch-pounds of torque. The Picatinny rail system (MIL-STD-1913) requires precise slot engagement to hold zero under recoil.
We'll walk through each check so you can verify your mount with confidence.
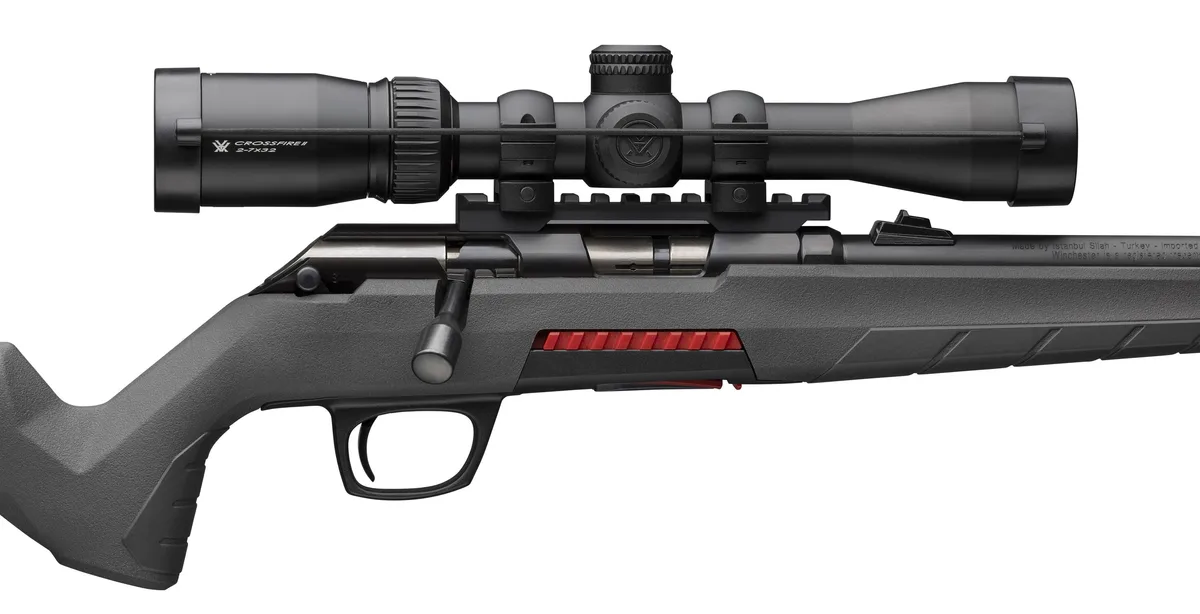
Image source: Web (Bing) / winchesterguns.com (Web image (fair-use with source credit))
Quick Answer
How do I check if my rifle scope is mounted correctly? Start with rail engagement, then verify screw torque. Use a calibrated torque wrench set to manufacturer specifications.
Check for scope cant with a bubble level or plumb line. Confirm eye relief and lens clearance before firing.
Why Most Scope Checks Miss the Obvious Things
Most shooters who ask this question want a quick yes-or-no answer. The problem is that a scope can pass a casual inspection and still fail under recoil.
Two things fool people constantly. A scope can sit level to your eye but carry a slight cant that only shows up at 300 yards or more. And ring screws can feel tight by hand yet be nowhere near the manufacturer's torque specification.
Research from NRA educational resources confirms that proper rifle setup, including optic mounting, is foundational to consistent accuracy. Yet verified buyer feedback shows many shooters skip the verification steps entirely. They tighten screws by feel and call the job done.
The same goes for rail engagement. A mount can look solid but only have partial contact with the Picatinny rail slots. Without full engagement, the scope shifts under the impulse of each shot.
As of 2026, most major optic manufacturers publish torque specs in inch-pounds on their mounting guides. The data is out there. The problem is that many shooters never look at it.
A proper mounting check isn't a single glance. It's a sequence of verifiable steps, each confirming one piece of the system.
The Quick Mental Check: Does Your Scope Pass These Three Things
Before you start measuring anything, run through three quick pass-or-fail checks. Each one rules out a different failure mode.
Check 1: Rail engagement. Look at where the scope base meets the rail. If the cross-bolts or lugs sit fully inside the rail slots with no visible gap, this check passes. If you see daylight between the lug and slot wall, the mount isn't secure.
Check 2: Screw torque. If you've used a calibrated torque wrench and hit the manufacturer's spec, this passes. If you tightened screws by hand, assume this check fails. Feel-based tightening almost always falls short of spec.
Check 3: Cant. Mount a bubble level on the scope tube. If the bubble centers when the rifle rests flat, cant is minimal. If the bubble consistently tilts one direction, the scope or rail is off-axis.
If all three checks pass, your mount is likely sound. If any one fails, that's your starting point for correction.
Checking Rail Engagement and Base Security
Picatinny rail engagement is the foundation of a solid mount. Here's what to verify.
What to look for
A Picatinny rail has evenly spaced slots. Each slot is 0.206 inches wide with 0.835 inches between slot centers. Your mount's cross-bolts or lugs must sit fully inside these slots.
Pull gently on the scope from the front and rear. If the mount rocks even slightly, the engagement isn't right.
Common engagement problems
| Problem | What it looks like | What to do |
|---|---|---|
| Partial slot engagement | Lug doesn't reach slot bottom | Check mount height and rail compatibility |
| Loose cross-bolt | Visible gap on one side | Torque the clamp screw to spec |
| Bent or worn rail | Irregular slot edges | Replace the rail |
Base screw check
Base screws secure the mount to the rail. Manufacturer specs typically list 20 to 25 inch-pounds for these fasteners. Verify with a torque wrench in an alternating pattern.
If the rail itself wobbles under hand pressure, the problem isn't the scope. The rail needs attention before anything else.
Torque Specs: The Number Most Shooters Get Wrong
Torque specs are where most mounting jobs go sideways. Too little, and the scope shifts under recoil. Too much, and you damage the tube.
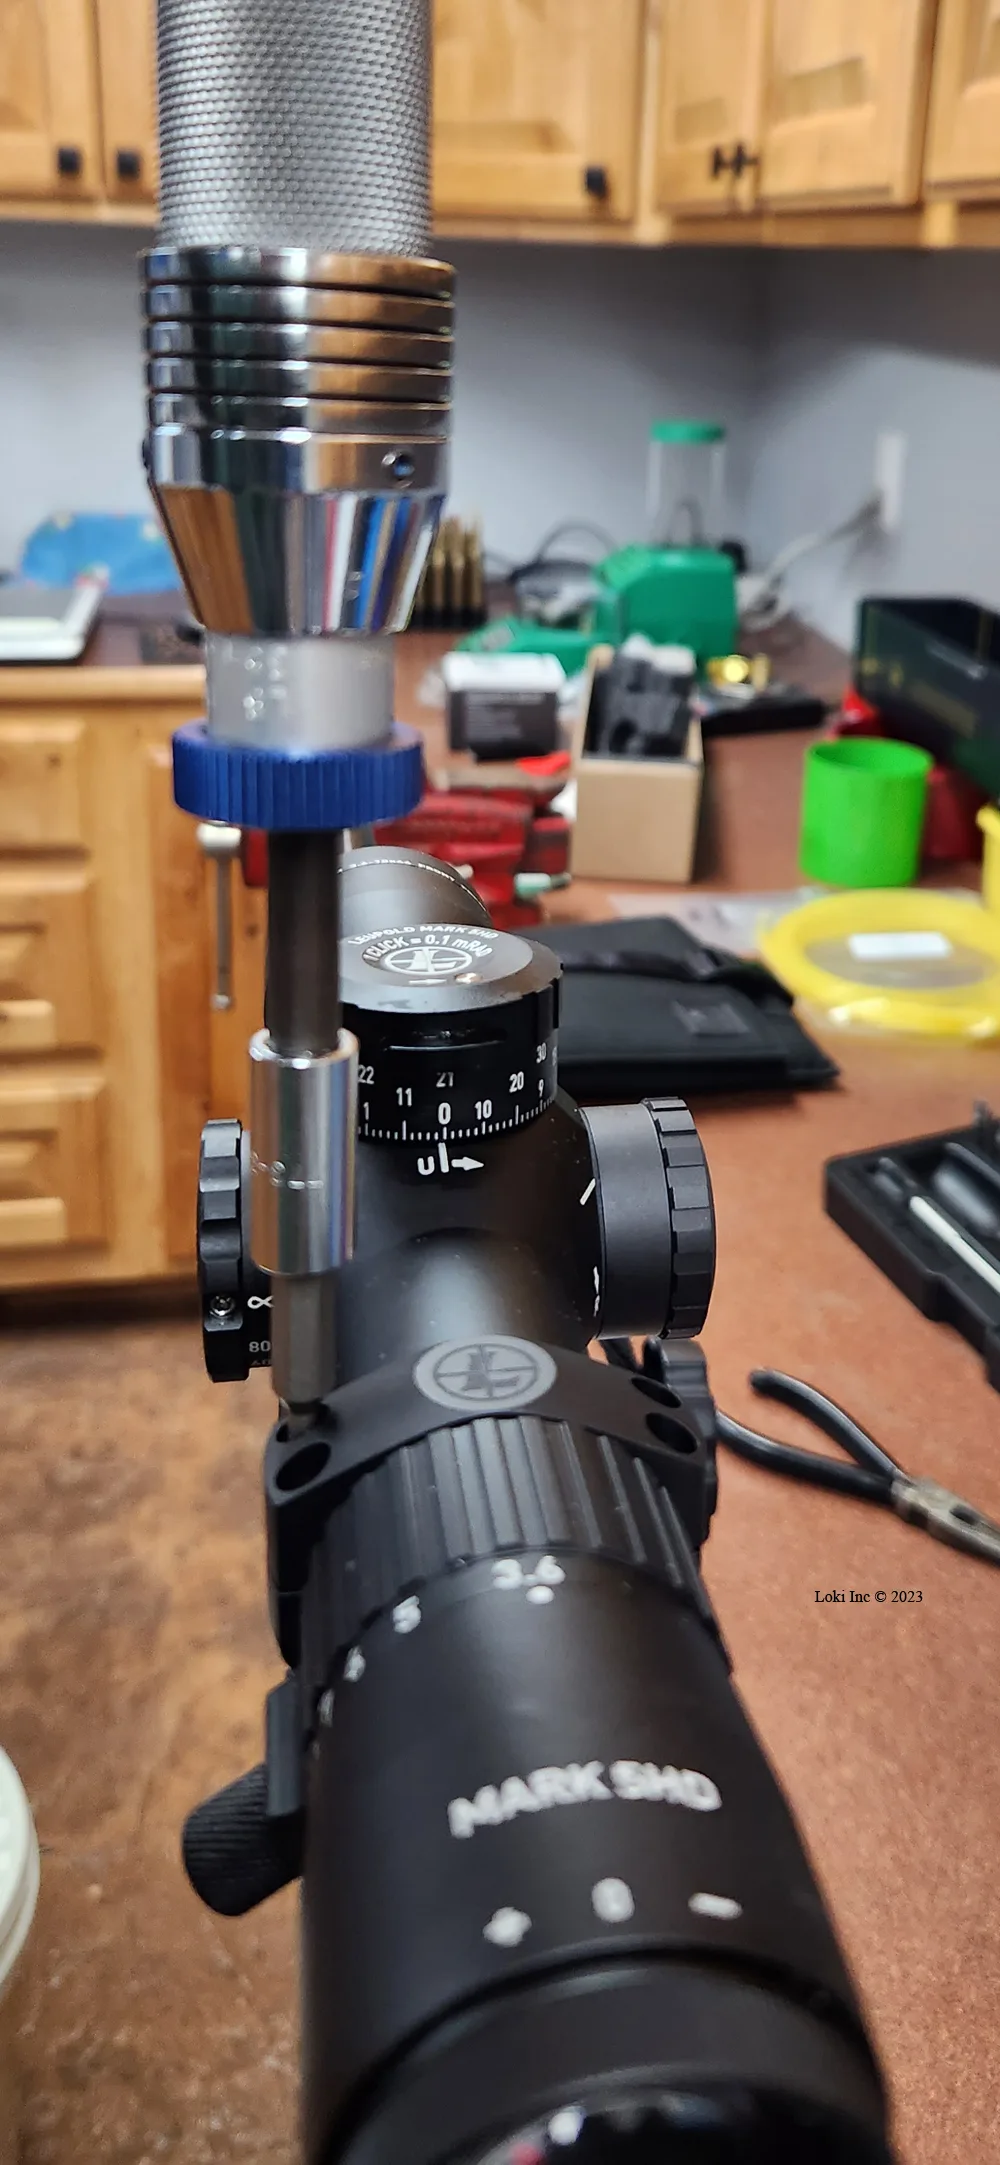
Image source: Web (Bing) / lokiconsult.com (Web image (fair-use with source credit))
Manufacturer specs vary by scope tube material and ring design. Here's a general guide:
| Component | Steel rings | Aluminum rings | Base-to-rail screws |
|---|---|---|---|
| Screw torque | 15-25 in-lbs | 10-18 in-lbs | 20-25 in-lbs |
As of 2026, Leupold, Vortex, and Burris all publish their torque specs on their official mounting guides. Always follow your specific optic manufacturer's numbers over any general chart.
You need a calibrated torque wrench for this job. A quality inch-pound model covers the range you need. Set it to spec, tighten in an alternating pattern, and stop when you feel the click.
Blue threadlocker on ring screws prevents backing out under recoil without making the job permanent. Apply a small drop to each screw before installation.
Fastener engineering research confirms that consistent, specified torque values outperform "hand-tight" every time in repeatable performance.
Spotting Scope Cant and Reticle Misalignment
Scope cant is a tilt of the optic relative to the rifle's bore axis. It's one of the most overlooked mounting issues, and it causes point-of-impact shifts that grow with distance.
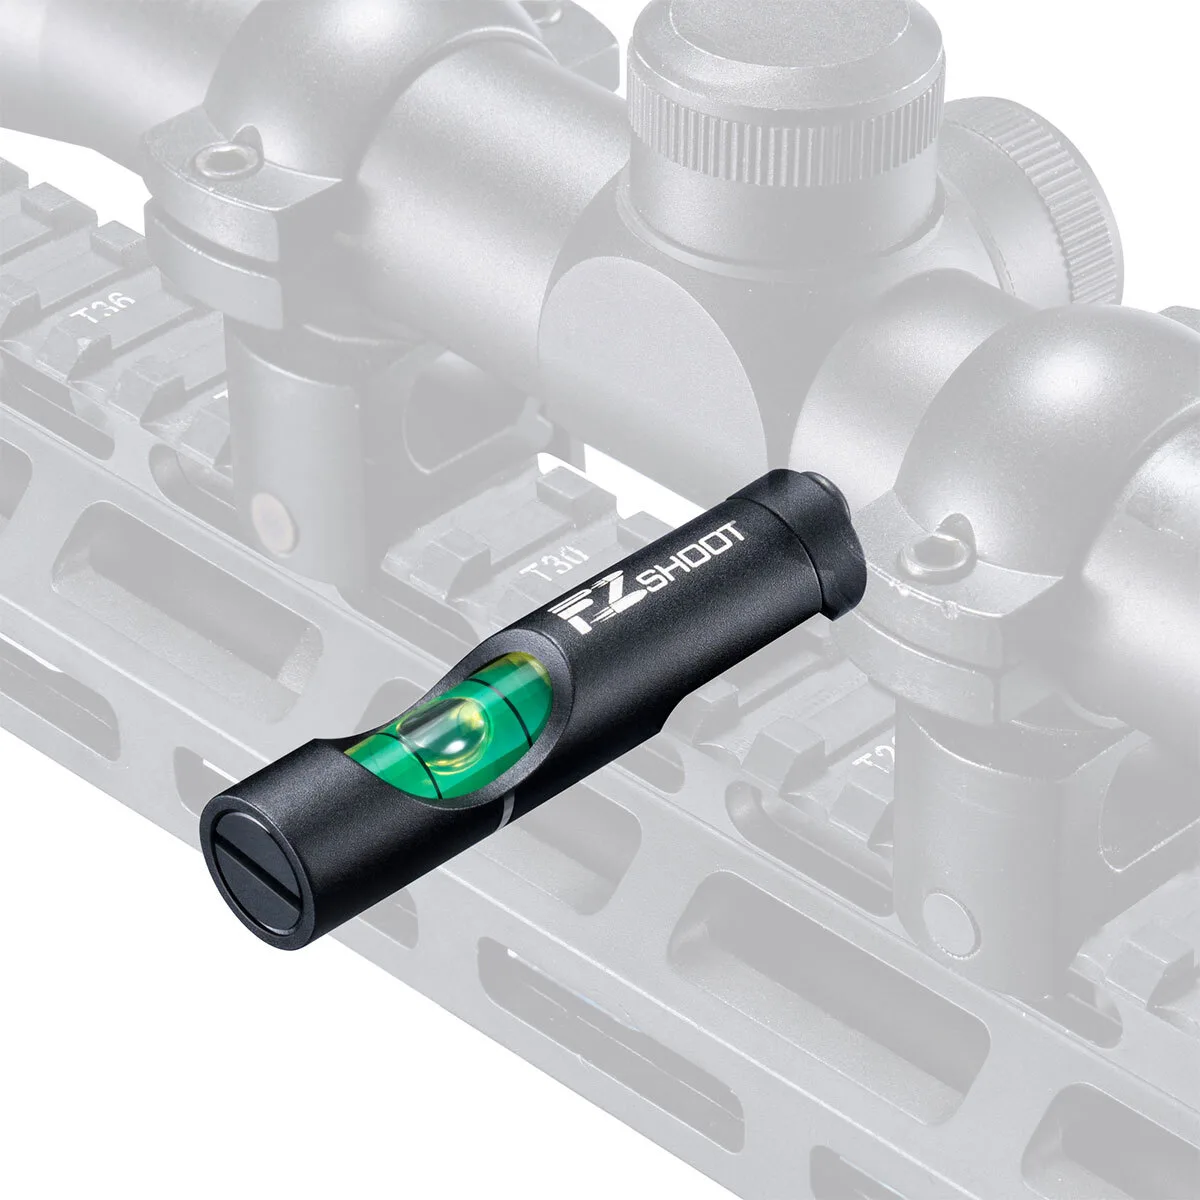
Image source: Web (Bing) / ebay.com (Web image (fair-use with source credit))
Why cant matters at distance
A 1-degree cant shifts your point of impact roughly 17.5 inches at 1000 yards. Even half a degree matters in long-range shooting. For hunting at 200 yards, the effect is smaller but still measurable.
How to check for cant
Mount a bubble level on the scope tube, not the rail. Place the rifle on a flat surface, let it rest naturally, and check the bubble. If it centers consistently, cant is minimal.
For a more precise check, run a plumb line behind the reticle at 100 yards. If the vertical reticle line doesn't align with the plumb line, you've got cant.
Reticle alignment verification
Confirm the reticle's vertical axis matches the scope tube's vertical axis. Manufacturer tolerances indicate the reticle should be centered within the tube. If it appears offset when you look through the scope at various magnifications, something may be wrong internally.
If cant is present and you've ruled out the mount, the issue may be the rail itself. A bent rail creates cant that no amount of ring adjustment can fix.
Eye Relief, Clearance, and Final Mounting Verification
Eye relief is the distance from your eye to the rear lens element. It's one of the last things to verify and one of the most important.
Most rifle scopes fall in the 3.5-inch to 4-inch range at typical magnification. Too close, and you risk scope bite under recoil. Too far, and your field of view shrinks.
Manufacturer specs for most hunting optics list a specific eye relief range at low power.
Shoulder the rifle in a natural shooting position. Check where your eye lands when you mount up. Adjust the scope forward or backward in the rings until you get a full sight picture without strain.
Lens and bell clearance
The objective lens bell needs room to clear the barrel or rail. Measure the gap between the bell and barrel. Most setups need at least 1/4 inch of clearance there.
If your mount height doesn't allow the bell to clear the barrel, you'll need higher rings. A 50mm objective lens almost always requires medium or high rings on a bolt-action rifle.
Final verification checklist
- Bubble level reads center on the scope tube
- All ring screws at manufacturer torque spec
- Base screws at 20-25 inch-pounds
- Cross-bolts fully engaged in rail slots
- Eye relief at 3.5 to 4 inches
- Objective bell clear of barrel by at least 1/4 inch
- No rocking or movement when pushing on the scope
- Blue threadlocker applied to all mounting screws
If every item checks off, the mount is verified. Now confirm with live fire at 25 to 50 yards to make sure the zero holds.
Common Scope Mounting Mistakes That Creep In
Certain errors pop up again and again in mounting jobs, even from experienced shooters.
Over-torquing ring screws is the most damaging mistake. Aluminum rings are especially vulnerable. Squeeze a 30mm aluminum ring past 18 inch-pounds and you can deform the scope tube inside.
Under-torque is equally common. Screws tightened by feel often sit below 10 inch-pounds. The scope slips forward or backward under recoil, and the zero walks with each shot.
Using the wrong ring size for the tube diameter causes uneven clamping. A 1-inch ring on a 30mm tube will never hold properly. Always match the ring to the scope tube spec.
Mounting on a misaligned rail introduces cant before you even install the scope. The U.S. Department of Defense MIL-STD-1913 Picatinny specification defines exact slot dimensions for a reason.
Deviations in rail manufacture or mounting position compound quickly.
Skipping threadlocker is the quiet mistake. Screws back out over time, especially on high-recoil calibers like .300 Winchester Magnum. A small amount of blue threadlocker prevents this without making future removal a nightmare.
Mounting without checking the reticle level before torquing screws down. Once screws are tight, the reticle is locked in position. Level it first, then torque.
Here's the practical takeaway. Work through the checks in order. Fix one issue before moving to the next.
A half-corrected mount with multiple unresolved problems produces inconsistent results you can't diagnose at the range.
Mounting Check FAQs
What torque should scope ring screws be?
Scope ring screws typically need 15 to 25 inch-pounds for steel rings and 10 to 18 inch-pounds for aluminum rings. Always defer to your specific optic manufacturer's published specs. A calibrated torque wrench set in an alternating tightening pattern ensures even clamping.
How do I know if my scope has cant?
Mount a bubble level on the scope tube and rest the rifle on a flat surface. If the bubble consistently tilts one direction, cant is present. For precision verification, run a plumb line behind the reticle at 100 yards and check alignment.
Can over-torqued scope rings damage my optic?
Yes. Over-torquing aluminum rings especially can deform the scope tube internally. This causes adjustment problems and can void the manufacturer warranty.
Follow torque specs exactly with a calibrated wrench.
How much eye relief should my rifle scope have?
Most rifle scopes need 3.5 to 4 inches of eye relief at typical magnification. Too close risks scope bite under recoil. Too far reduces your field of view.
Adjust the scope's position in the rings until the sight picture feels natural.
What is the difference between bore sighting and zeroing?
Bore sighting aligns the scope's point of aim roughly with the bore using visual alignment or a laser tool. It gets you on paper at 25 to 100 yards. Zeroing is the actual process of adjusting the scope so the bullet impacts the point of aim at your chosen distance.
Should I use threadlocker on scope screws?
Blue threadlocker (medium strength) is recommended for ring and base screws. It prevents backing out under recoil while still allowing removal with hand tools. Red threadlocker should be avoided since it requires heat to break free.