Is the light inside your old gun safe flickering or completely out? Replacing those small but important lights might seem tricky, but it doesn’t have to be.
You want your safe well-lit so you can find your gear quickly and keep everything secure. In this guide, you’ll discover simple steps to replace your gun safe lights without hassle. By the end, you’ll feel confident and ready to brighten up your safe, making your next visit smoother and safer.
Keep reading to learn how easy it can be to fix those old lights!
Choosing The Right Replacement Light
Choosing the right replacement light for your gun safe is important. The light must fit well and work properly. It helps you see inside the safe clearly. A good light also saves battery power and lasts long. This section explains what to consider when picking a new light for your gun safe.
Types Of Gun Safe Lights
Gun safe lights come in different types. Some use LED bulbs, which are bright and use little power. Others have fluorescent lights, but they use more energy. Some lights are motion-activated, turning on when you open the door. Others have a switch to turn on manually. Choose a type that fits your needs and style.
Brightness And Battery Life
Brightness matters for clear visibility inside the safe. Too dim, and you may struggle to see your items. Too bright can waste battery quickly. Look for lights that balance brightness with long battery life. LED lights often offer the best mix. Check battery type and how long it lasts before replacement.
Compatibility With Your Safe
Not all lights fit every gun safe. Check the size and shape of your current light. Some safes have special mounts or holders. Make sure the new light fits securely in your safe. Also, check the power source, whether it needs batteries or connects to power. Proper fit ensures safety and good lighting.

Gathering Necessary Tools
Before replacing old gun safe lights, gather all tools and safety gear. Being prepared saves time and avoids frustration. It also ensures the job goes smoothly without damage.
Basic Tools Needed
Start with a screwdriver set for removing light covers and screws. A replacement bulb or LED light is necessary for new lighting. A voltage tester checks if power is off. Pliers help with wiring and connectors. A small flashlight can aid visibility inside the safe. Keep a clean cloth handy to wipe dust and dirt.
Safety Gear And Precautions
Wear safety glasses to protect your eyes from dust or sparks. Use insulated gloves to prevent electric shocks. Work in a well-lit area to see clearly. Make sure the safe is unplugged before starting. Avoid wearing loose clothing or jewelry near wires. Stay calm and patient during the process.
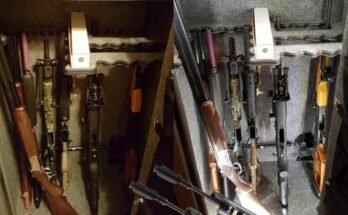
Removing The Old Light
Removing the old light from your gun safe is the first step in upgrading to better lighting. This process needs care to avoid damage or injury. Follow simple steps to safely take out the old light fixture.
Turning Off Power Or Removing Batteries
Start by cutting off the power supply to the light. If your safe light uses batteries, take them out. This stops any chance of electric shock or short circuits. Double-check that no power flows to the light before moving on.
Accessing The Light Fixture
Open the safe door fully to reach the light fixture. Look inside the safe at the top or side walls. Some lights are covered by a small panel or cover. Remove any screws or clips holding the cover in place. Keep the cover and screws safe for later use.
Detaching The Old Light
Once the fixture is visible, examine how it is attached. Some lights twist off, others need small screws removed. Use a screwdriver or your hands to carefully detach the light. Avoid pulling on wires. Gently disconnect any wiring connectors or clips. Set the old light aside for disposal or recycling.
Installing The New Light
Installing the new light in your gun safe is a simple process. It improves visibility and safety inside the safe. Follow these clear steps to set up your new light quickly and correctly.
Positioning The New Light
Choose a spot inside the safe where the light will shine evenly. Usually, the top or side wall works best. Make sure the area is clean and dry before placing the light. Avoid spots where the light might get blocked by shelves or guns.
Connecting Power Or Inserting Batteries
Check the type of power your new light uses. If it runs on batteries, open the battery compartment carefully. Insert fresh batteries in the correct direction. For plug-in lights, connect the wires firmly to the power source. Ensure all connections are secure to avoid flickering.
Securing The Fixture
Use screws, adhesive strips, or magnets to hold the light in place. Tighten screws just enough to keep the light steady. Do not overtighten and risk damaging the safe walls. Test the light by turning it on to confirm it stays firmly fixed.
Testing And Adjustments
Testing and adjusting your new gun safe lights is key for perfect visibility. This step ensures the light works well and fits your needs. Proper testing helps avoid future problems and keeps your safe well-lit.
Checking Light Functionality
Turn on the light to check if it powers up. Watch for any flickering or dim spots. Confirm the light stays steady without shutting off. Replace batteries or check wiring if it fails to light.
Adjusting Brightness Or Angle
Set the brightness to a comfortable level. Avoid lights that are too bright or too dim. Tilt or rotate the light to cover the entire safe interior. Make small adjustments until you see every corner clearly.
Troubleshooting Common Issues
Loose connections can cause the light to flicker or fail. Tighten screws or reconnect wires to fix this. Dirty contacts may block power flow; clean them gently. Replace bulbs if the light remains weak after adjustments.

Maintaining Your Gun Safe Light
Maintaining your gun safe light keeps your safe functional and secure. Bright light helps you see your guns clearly inside the safe. Regular care extends the life of the light and prevents sudden failures. Simple steps keep the light working well for years.
Regular Cleaning Tips
Dust and dirt can dim your gun safe light. Clean the light cover with a soft cloth often. Avoid using water or harsh chemicals that damage the light. Use a dry brush to remove dirt from corners and crevices. Clean the battery contacts gently to keep a good connection.
Battery Replacement Schedule
Old batteries cause dim or flickering light. Change batteries every 6 to 12 months for best results. Use fresh, high-quality batteries for longer life. Check the battery status monthly to avoid surprises. Remove batteries if the safe will not be used for a long time.
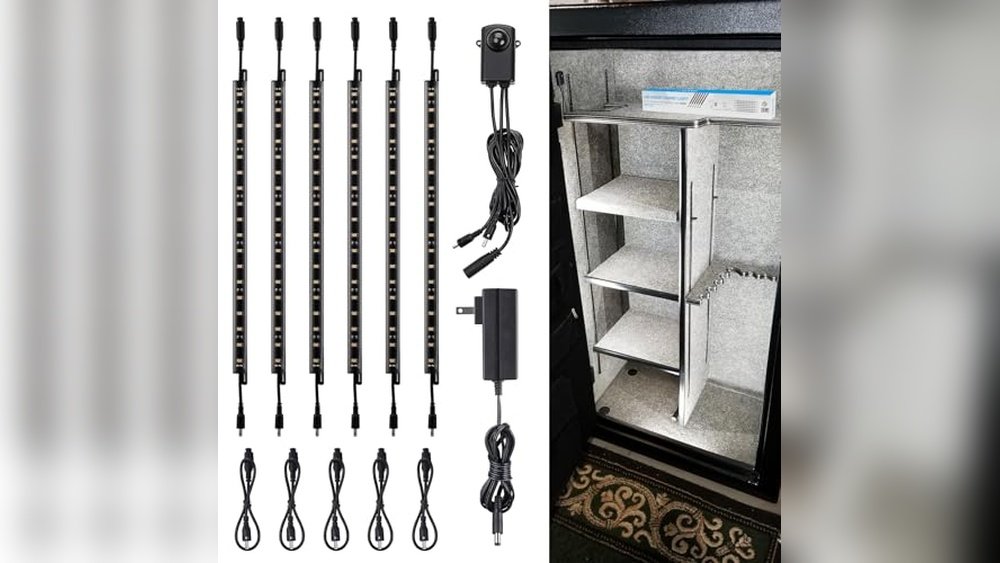
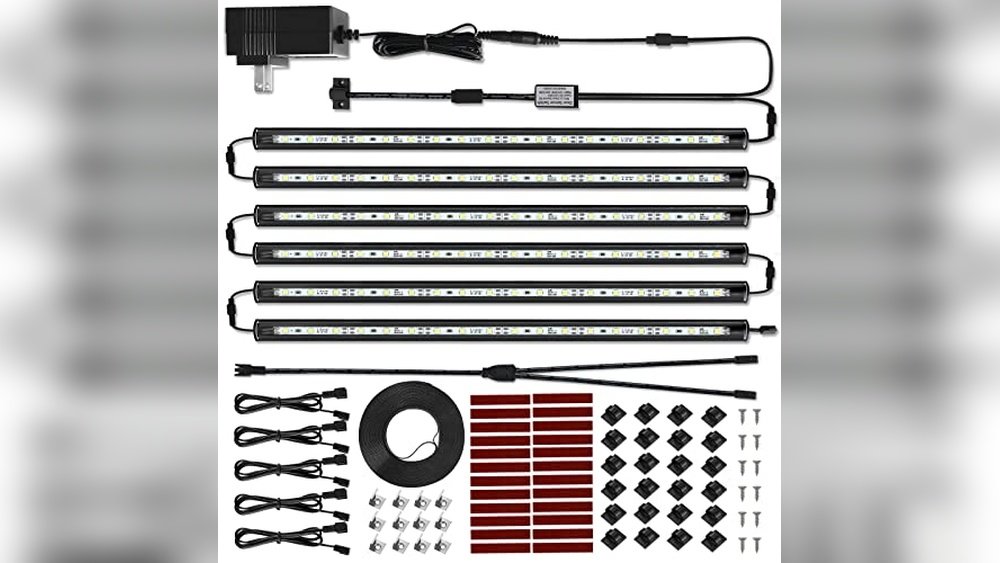
Upgrading To Advanced Lighting Options
LED lights save energy and last longer than bulbs. Consider motion sensor lights for automatic on and off. Choose lights with adjustable brightness to suit your needs. Rechargeable battery lights reduce waste and save money. Upgrade your light for better visibility and convenience.

Frequently Asked Questions
How Do I Choose The Right Replacement Light For My Gun Safe?
Choose LED lights with low heat and high brightness. Ensure the size fits your safe’s light fixture. Battery-powered or magnetic strip lights are great options for easy installation.
Can I Replace Gun Safe Lights Without Professional Help?
Yes, most gun safe lights are easy to replace. Turn off the power, remove the old light, and install the new one. Follow the manufacturer’s instructions for safety and proper fit.
What Type Of Battery Is Best For Gun Safe Lights?
Use long-lasting lithium or alkaline batteries for reliable performance. Rechargeable batteries can save money but need regular charging. Always check compatibility with your light model.
How Do I Install Led Strip Lights In A Gun Safe?
Clean the surface before applying the adhesive strip. Measure and cut the LED strip to size. Attach the strip inside the safe, near the door or ceiling, for optimal lighting.
Conclusion
Replacing old gun safe lights is simple and keeps your safe well-lit. Choose the right bulbs and tools before starting. Always turn off power to stay safe during the process. Remove old lights carefully, then install new ones securely. Test the lights to make sure they work properly.
Bright, clear lighting helps you find items quickly and safely. Regularly check and replace lights to maintain good visibility. A well-lit gun safe protects both your belongings and peace of mind. Taking these easy steps ensures your safe stays reliable and user-friendly.